Overview
Before initiating or responding to payment claims, ensure your organisation’s details and account settings are configured. This guide outlines each step required to complete your initial set-up.

- Setting up the Organisational Account Details
- Selecting and activating a subscription. (Required to issue a claim or payment schedule).
- Set your organisation type.
- Time Zone
- Manage Users & Permissions
- Email Summary Settings
- Account Types explained
Tip! Organisation Details are managed by the account "Owner".
Go to the 'Manage Account' tab to manage Account-wide settings.
https://app.mypaylab.com/manage-account

Tip: To edit sections, click on the Pencil Icon
Organisation Details
At the top of the Manage Account page is the Company Details section. Add these for automatic inclusion on Claims and Payment Schedules.
- Company Name (initially completed during setup).
- Company Address
- Company Phone Number
- Company Website
- GST Number (Used when issuing Buyer Created Tax Invoices)

- Company Logo - Simply click the "Change Photo" button and select from your Image File Manager
Manage Subscription
To manage your subscription, head down to Plan & Payment > Choose a Plan. This is also where you will go to change your subscription and view your Billing History.
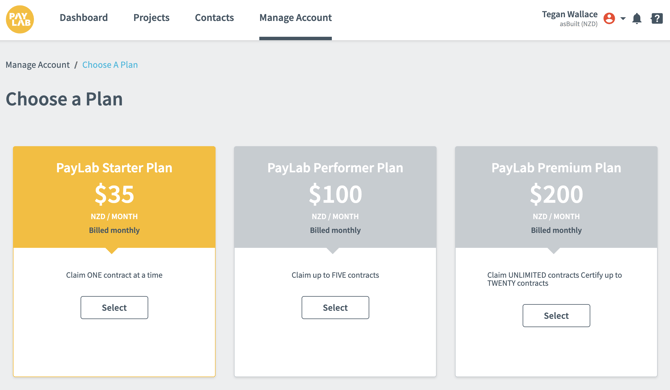
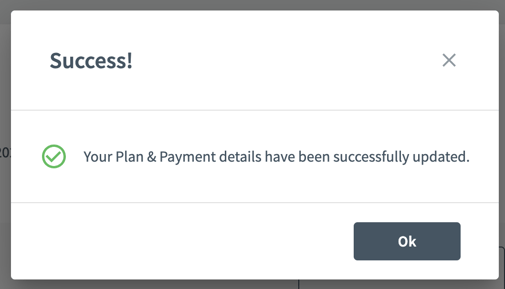
Select which plan you best suits your company and you will be redirected to Stripe to enter your payment details. A confirmation pop-up window will appear once your payment details have been verified.

Organisation Type
This is where you select what type of organisation you belong to. The one you select will determine what type of Projects will be created by default.
Claiming Only
- Projects will only have a single contract that your organisation makes claims against.
- Typically for: Subcontractor, Consultant, Client Project Manager.
Approving Only - Payment Schedules Only
- Projects will only have contracts that your organisation approves.
- Typically for: Owner/Developer, Home Builder.
Payment Schedules and Claiming
- Projects will have a mixture of contracts that your organisation makes claims and approves.
- Typically for: Head/Main/General Contractors.
Time Zone
This time zone setting affects account-level features only, such as when automatic emails are sent.
Note: Claim and Payment Schedule dates and times are governed by the specific time zone set for each Contract. This is typically configured automatically based on the Project or Contract address.
Users & Permissions - Inviting new Users
PayLab > Manage Account > Users & Permissions
This is where you will manage Users for the Organisational Account.
Adding a new user
Click Add New User.

Enter the name and email of your new User within your company.

Select the appropriate Account Level Access for them.

Account Access types
- None - Will not see any details in PayLab until granted an Access Level.
- Admin - Can invite, add or remove other users. They may also edit company details, manage projects and contracts.
- Viewer - May view projects, but can not invite others, submit or Approve Claims or edit company or project details.
Click 'Save', and PayLab will add them to the user list and send an email notifying them they have been invited.

For comprehensive instructions on updating, removing, or managing your organisation’s PayLab users, navigate to How To Guides > Manage PayLab Account Users & Permissions.
Account Level Permissions
You can then select the Owner, Admin, or Viewer. These are applied at account level, becoming the default access applied to all projects & contracts.
What to expect as a new user
The table below outlines the onboarding process when you’re first invited to PayLab. All users receive an invitation email; however, subsequent steps depend on whether your email provider supports One Time Passwords (OTP) or requires Multi-Factor Authentication (MFA), as is common with Microsoft business accounts.
| Activity | Email Provider accepts OTP | Email provider requires MFA |
| New Organisation setup |
Owner user receives invite email |
Owner user receives invite email |
| PayLab invite to organisation email | All users | All users |
|
Authentication |
One Time Password email is sent with a code to enter into PayLab. For a few weeks, that browser will typically not require additional authentication. |
Email provider account password |
Next Step - Set Up Your First Project
You’re now ready to create your first PayLab Project and associated Contract.
If you’ve received a contract invitation from another PayLab Organisation Account, click the link in your email to mirror the project into your own PayLab account. Otherwise, use the links below or explore additional guides in our Knowledge Base:
Related articles & pages
- Managing your subscription
- Manage Paylab Account Users & Permissions
- Security at asBuilt
- PayLab Email Alerts - How to control how frequently (if at all) PayLab notifies you.