Manage your Vault by adding users, creating projects, assigning users to projects and editing projects.
OVERVIEW
This guide will take you through the steps to managing your Vault. These quick links will jump straight to each point
- Add Users to your Vault
- Create Projects within Vault
- Assign Users to Projects
- Edit Projects - Linking Assets
HOW TO USE IT
Adding Users to your Vault
First go to your 'Manage Vault' in the left hand menu.
If you can’t see this, you need greater permissions, please talk to your Vault Manager or the Vault Support team.
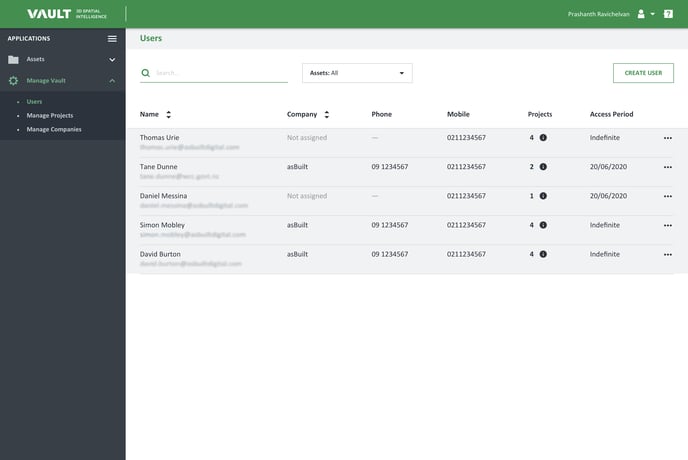
You will see this below, and on the top right select 'Create User'. Fill in the Details as appropriate.
.png?width=688&name=Manage%20Vault%20Screen%202%20(Create%20User).png)
Once you have created a User, you need to add them to an Asset or Project to grant the access permissions required for them to use Vault. Permissions include which assets they can view, what role they have on each asset, and more. To assign users to projects go to Assign Users to Projects.
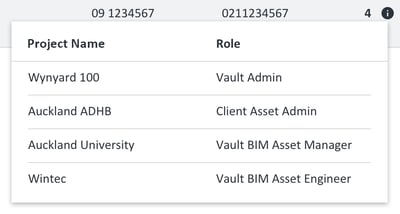
By rolling over the information icon, you can see the projects the user is assigned to.
Within Vault we assign everything using the Asset and Project as the Base, rather than Users. Therefore, to assign access permissions, you need to do this within the Project itself by going to the Manage Projects menu item.
Creating Projects in Vault
Creating a Project enables you to ensure all stakeholders are added to Assets and given the right permissions from the start. As additional people are required to join the Project, you can do so by repeating the below steps.
First go to 'Manage Vault' in the left hand menu and select 'Manage Projects'. If you can’t see this, you need greater permissions, please talk to your Vault Manager or the Vault Support team.
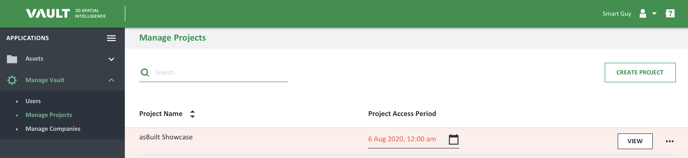
Once you’re here, select 'Create Project' on the right-hand side, and enter in the key Project details.
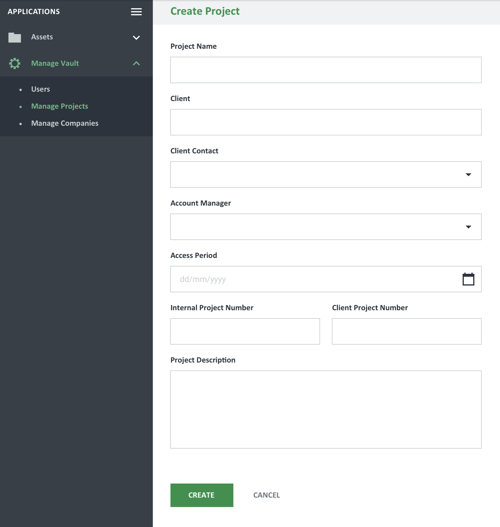
The more details you can add at the start, the more searchable and useful the data will be.
Assigning Users to Projects
Click on the 'Manage Projects' menu item on the left-hand side navigation bar.
Find the Project you want add the User too; and click the three dots at the right end, selecting 'Manage Users'.
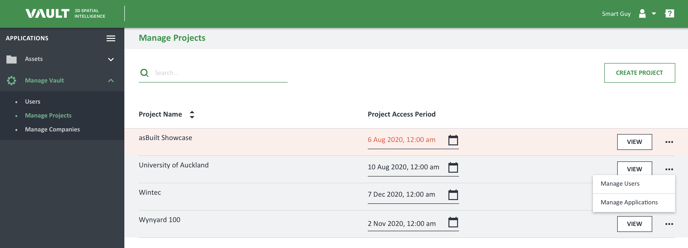
If you see a Project highlighted in red, this means access to the Project for all parties has expired. Reset this to a future date if you’d like to grant continued access.
You’ll then see the below pop-up where you can simply select the Users you wish to give access to the Project.
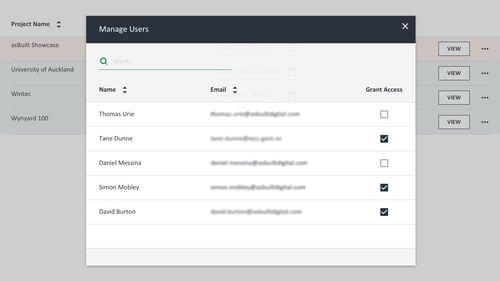
Filtering to see if a User is already assigned to a Project
At the top of the screen beside the Search bar, you can select a Project and see everyone who has access to it. Note that the check boxes act as a filter rather than a cumulative listing - by selecting multiple boxes, you will only see who has access to every Project ticked not everyone who has access to every Project ticked.
To update information on the project itself, or to create a new project, read Creating Projects in Vault
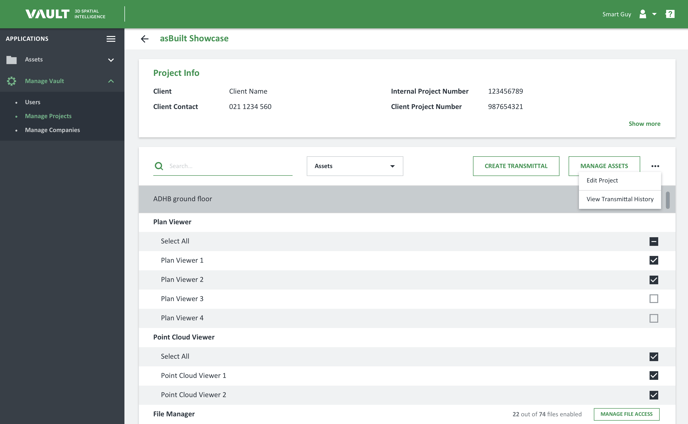
Editing Projects - Linking Assets
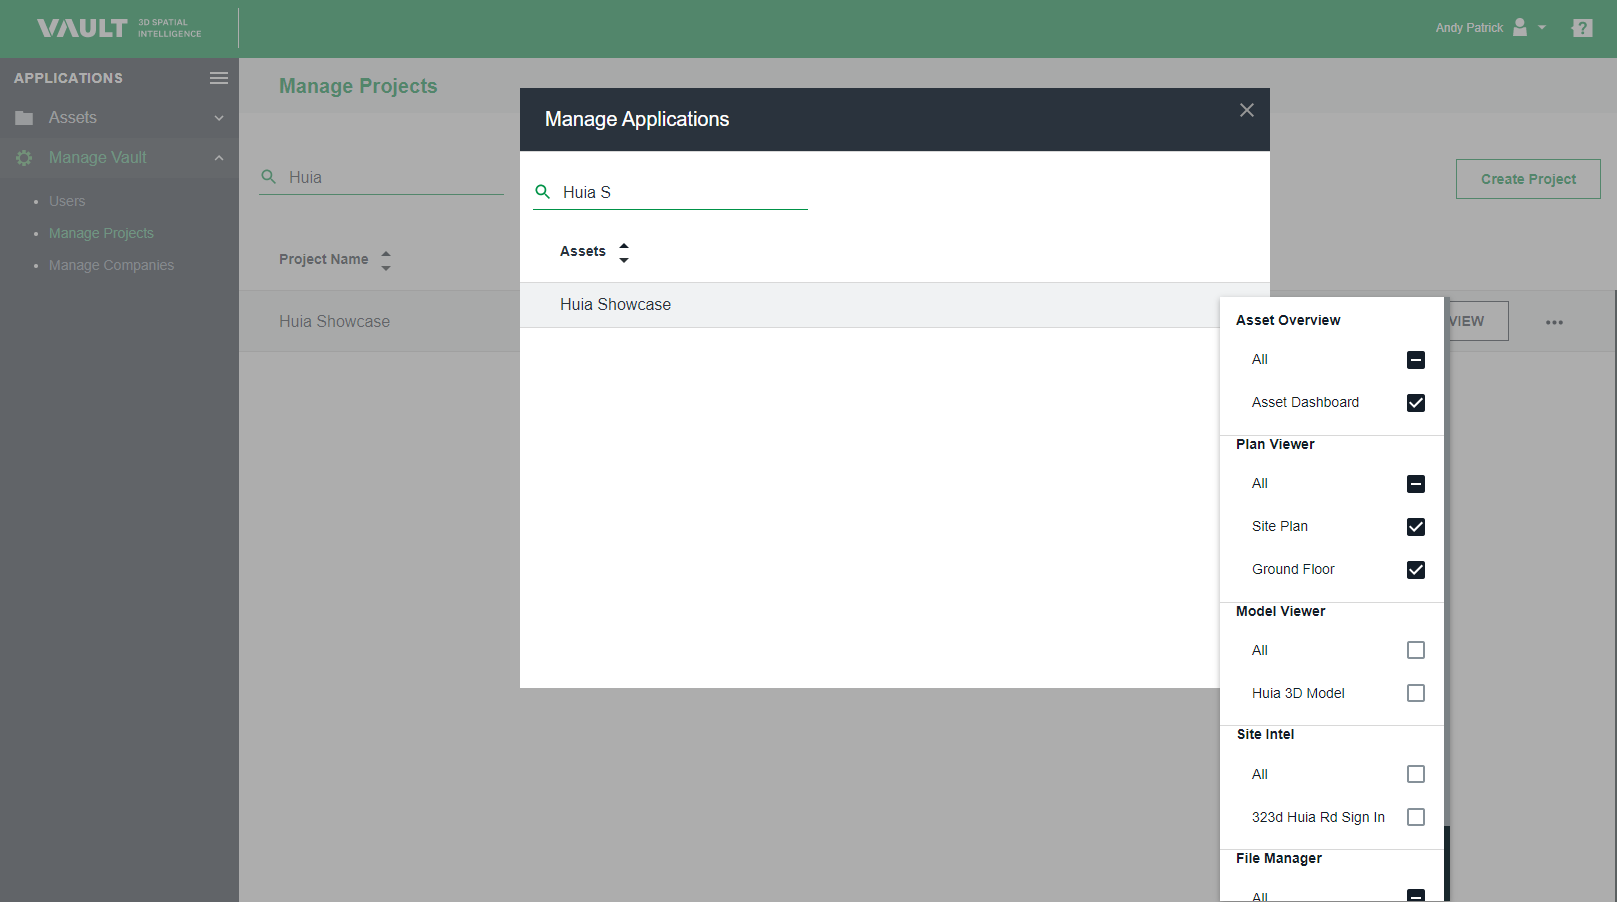
Once you have created the Project and added the Users, it needs to be linked to an Asset, or group of Assets. Again, select the Project and the three dots to the far-right side, clicking on Manage Applications.
To add or assign Users to a Project please see this.
You can search for the Asset or scroll through them and select the one you wish to link to the Project. Next select what elements you want everyone in the Project to be able to view.
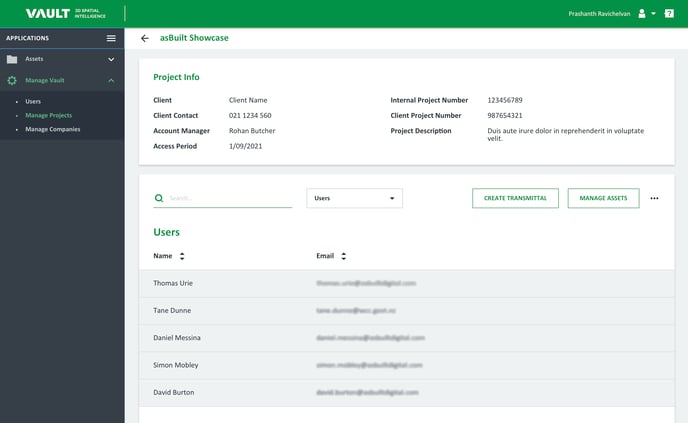
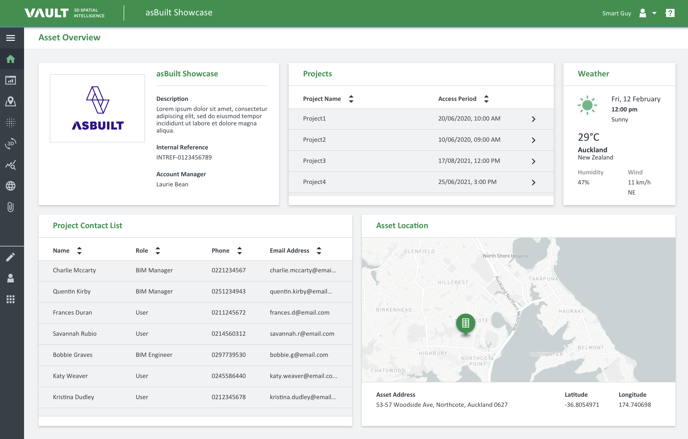
To check you have all the information in place, go manage Projects, find your project and select the View button. In the centre of this screen, you have a dropdown for Users and Assets which enables you to check both of these.
You can set a User access to be Indefinite (general Vault access), and a Project to a defined date. This will give the User ability to log in to Vault, and only see the Projects they currently have access too.
You can also go to the Asset you’ve been working with and open the Asset Dashboard. By selecting the Project Contact List dropdown you can pull up the list of all people involved with the project and who has access.
You can repeat these steps each time you wish to Edit your Project with new Users or Assets.
Once you have this set up, next step is to start adding digital assets like: