Create a Point Cloud of your project in Vault, using DroneDeploy for reliable and assured modeling quality.
OVERVIEW
This guide will take you through the steps to exporting your Point Cloud from DroneDeploy and uploading to your Vault asset.
WHEN TO USE IT
Read through this guide prior to setting up the Point Cloud feature on Vault to make sure you select all the correct settings.
HOW TO USE IT
Export you Point Cloud Model from DroneDeploy
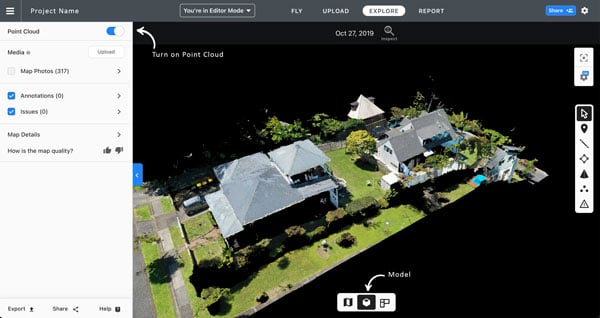
Login to DroneDeploy and locate your Project.
Select MODEL at the bottom of the map, move Point Cloud slider to be 'ON'
Hit Export button at the bottom. Now you need to set up the export by selecting the following:
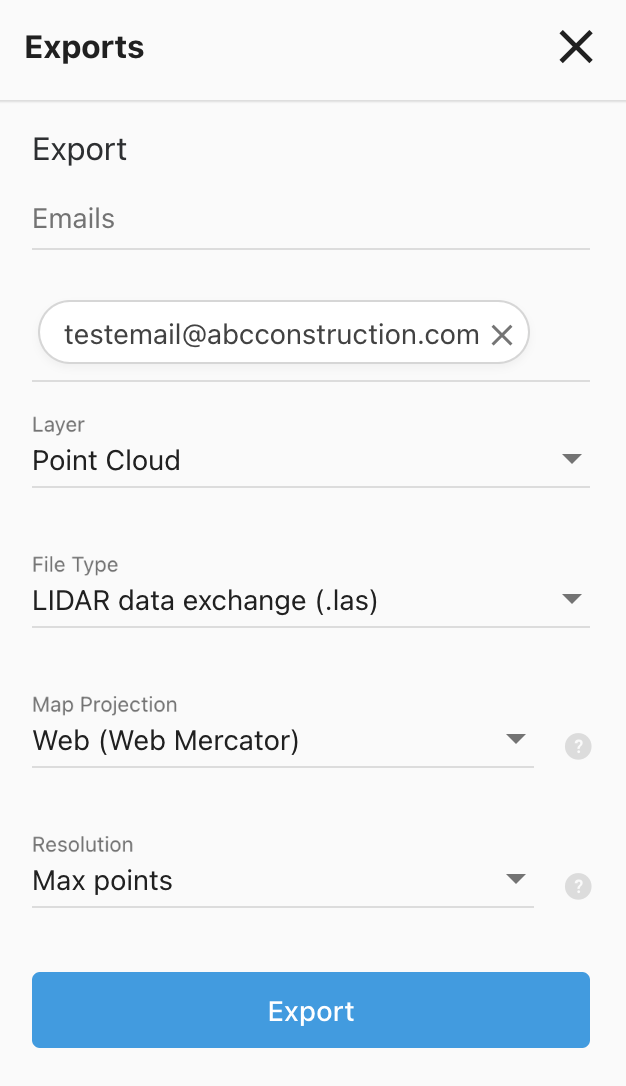 Email: The recipient you want to send it to (who will be uploading to Vault)
- Layer: Point Cloud
- File Type: LIDAR data exchange (.las)
- This .las file type works with Vault (normally around 100MB)
- Map Projection: Web (web Mercator)
- Resolution: Max points
Note: Ignore the Map Photos in the side bar, it’s all the photos generated by the 3D mesh and we don’t really use them ever.
Select Export and the export will be sent to you via email. Download export to desired folder. Processing time may vary depending on the size of the point cloud.
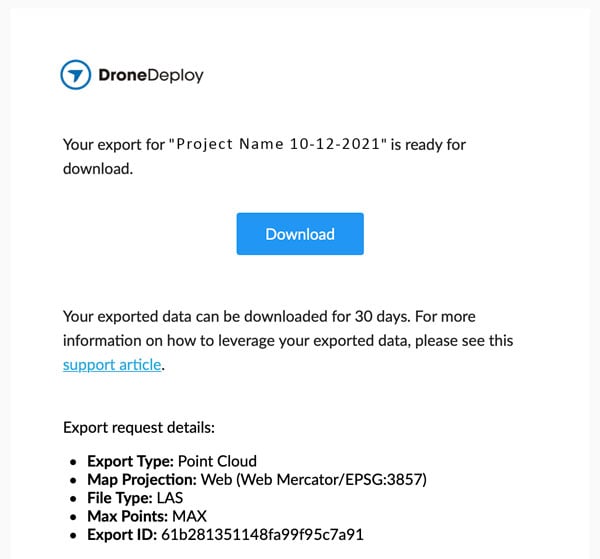
Unzip it, and get the GeoTIF out (it has the .las file extension)
Rename it to something relating to the asset (DroneDeploy always name the file “points.las” which is not overly helpful)
Zip/Compress the file for delivery to the Vault Support team. They will then upload it to the Azure Blob Storage and provide you back a SAS token.
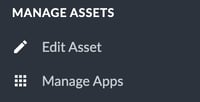
Upload Point Cloud in Vault
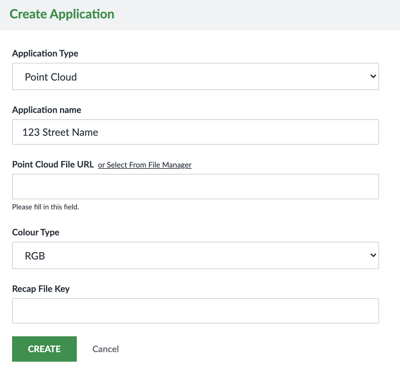
First, create the Point Cloud App
Manage Apps > Add application > Point Cloud
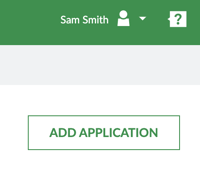
Complete the fields as follows and then click 'Create':
- Name: Ideally the asset address
- File URL: Paste in the SAS token URL provided by BIM Engineer
- Colour Type: RGB