Overview
Before you can send or respond to payment claims, your organisation must create a PayLab account, with at least one user email linked to it. We call this the 'Get Started - New Company' step, and this guide takes you through the one-off organisation and initial user setup.
Every new PayLab organisation and user will need to undertake at this setup journey, before getting underway with the ongoing Claims and Payment Schedules steps.

- Step 1: Creating an Account - Get your Organisation onto PayLab!
- Step 2: Activating your user email - Follow the email invite
- Step 3: Settings up the Organisational Account
- Setting up other users
- Accounts Types explained
Create an Account
Creating an account on PayLab for an organisation is easy, and free.
Typically, the Owner (read more about user types here) of the PayLab account will first set up the Account. In the same step, their email is also linked and invited to that organisational Account.
|
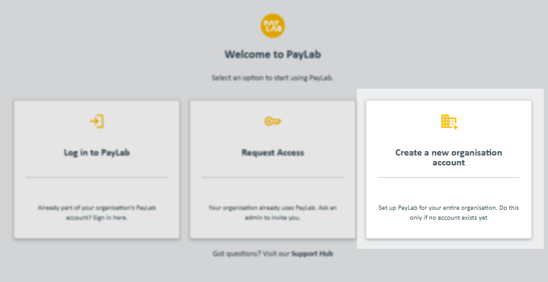
Go to the PayLab Login Page, click 'Create a new organisation account'. |
Go here - https://app.mypaylab.com/login The regular login page has a button for creating a new organisation account, 'Create a new organisation account', click this to begin.
Warning; if your Organisation already uses PayLab account, select 'Log in to PayLab'. Individual users are only linked and created by following a PayLab issued invitation link issued from someone already within the PayLab Organisational Account. |
|
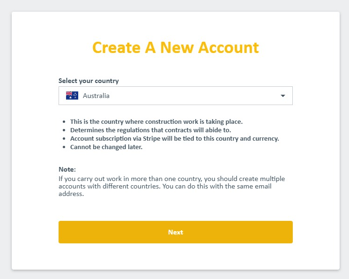
Select the country the claims will apply to. |
Click the drop down and find the country your organisation will be lodging claims within.
Then click next. When linking a PayLab contract between contract party, both Accounts must share the same 'Account Country'. The account selected country informs various settings including legal text, default phone number, default tax rate etc. It is intended that one Account is setup per jurisdiction (ie, PayLab enforces all claims to apply a single currency within each Account). If your organisation's contracts span more than one jurisdiction, you will need to create separate Accounts for each jurisdiction. For example, if claiming for two contracts, one claimed in Australia, and one in the United Kingdom, two PayLab accounts would be required, each with the Account Country set to their respective Australia or United Kingdom. Once an Account is created, the Account Country cannot be changed. |
|
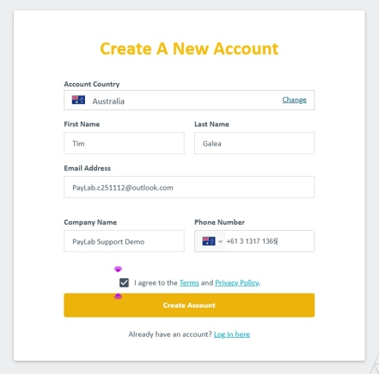
Provide basic identity information. |
Enter basic identity information for you and your organisation. individual details; Your first & last name, & your email address. Organisation details; Company name & phone number. Click Create Account. A PayLab invitation email will be sent to the provided email address, with a link to login and then activate the new PayLab Organisational Account. |
|
Next step: Login with the email to activate the new Account |
The page now says 'Almost Done' - You will be asked to return to your email and follow a confirmation link to complete the activation of the new Account.
Go to the 'Activate & link a user to an account' section of this guide and Activate your email with PayLab, for instructions on following the invite link and logging in as a new user. |

The invite email provided at the end of the Create Account step contains a URL that can complete activation of the new account.
Only this invite email URL will work for activating your account.
Newly invited users will receive an email from PayLab. They will be asked to login using either a One Time Password (OTP), or alternatively using the Microsoft Account password and MFA associated with that email account.
The invited user must have access to their email in order to complete these steps.
Here are the steps, showing images for a One Time Password account, but similar for other user authentication methods.
| Click the link inside the Invite email. |
An email with subject 'Invitation to PayLab' will be sent to the new user's email.In this email, click on the 'Open PayLab' button to begin activating (if new) and linking the email to the PayLab Account.
Some email providers can mistakenly block the 'Open PayLab' button. If you find the button doesn't work, just right click on it and select 'Copy Link', then paste the copied URL into your browser. |
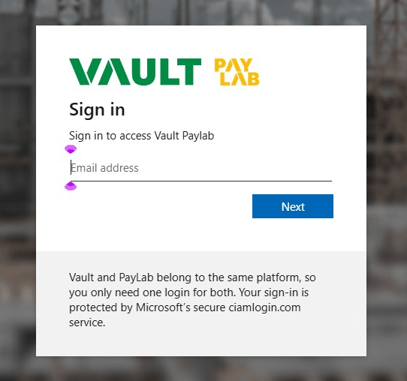
| Sign in |
Enter the email as invited; You will be taken to a Vault-PayLab sign in screen, requesting the user to enter their user email address and begin the authentication process.
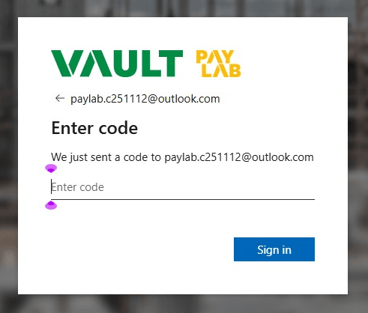
Enter the email address that the invite was sent to and click 'Next'. If your email provider allows OTP, A one off 'Account verification code' will be sent by email,
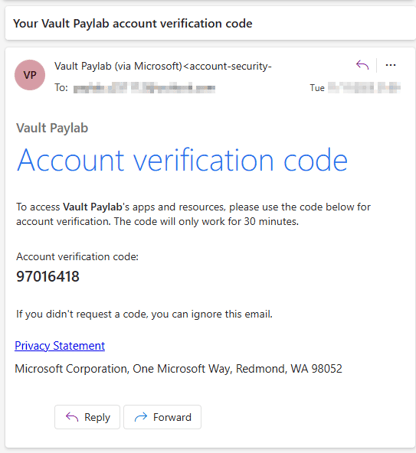
Example email sent with subject 'Your Vault PayLab account verification code', from account-security-noreply@accountprotection.microsoft.com Enter the 'Account verification code' (One Time Password);
The next web page will ask you to 'Enter code'. Enter the code just received by email.
|
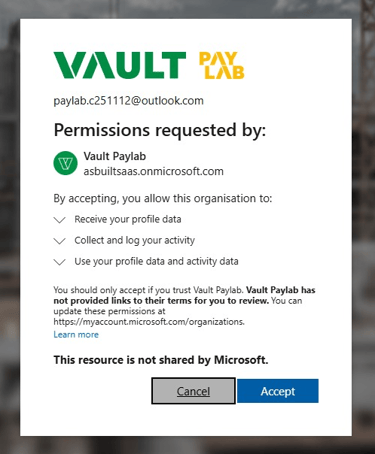
| Accept required permissions |
If this is the first time email address has accessed a Vault PayLab product, they will need to accept the required permissions by clicking 'Accept'.
|
| Enter PayLab! |
You should now be taken to the PayLab Dashboard main page. |

Many business email accounts will enforce a different authentication process. This could include providing your email account password, an Authenticator app, SMS or a call to your phone. In this case follow the steps prompted.
Setting up an Organisational Account (Manage Account)
After creating an account and logging in the Owner, there are some other additional steps you may wish to take before issuing a claim or payment schedule.
- Invite additional PayLab users into your account. There is no limit.
- Add details for heading issued documents. Incl. address, phone, website, and logo.
- Activate a subscription. This is required to issue a claim or payment schedule.
- Set your organisation type. This is to streamline the way PayLab leads users through Projects and contracts.
- Timezone
- Email notifications
- Integrate PayLab with other products.
Where to go to set Account-wide settings
Go to the 'Manage Account' tab to manage Account-wide settings.
https://app.mypaylab.com/manage-account

 |
In most sections, click the 'Pencil' icon to edit the property. |
Company Details
At the top of the Manage Account page is the Company Details section. Add these for for automatic inclusion on Claims and Payment Schedules.
- Company Name (initially completed during setup).
- Company Logo
- Company Address
- Company Phone Number
- Company Website
- GST Number (Used when issuing Buyer Created Tax Invoices)

Manage Subscription
To manage your subscription, head down to Plan & Payment > Choose a Plan. This is also where you will go to change your subscription and view your Billing History.
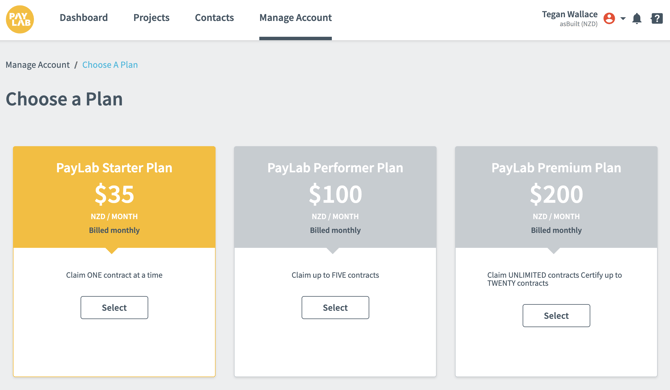
Select which plan you best suits your company and you will be redirected to Stripe to enter your payment details. A confirmation pop-up window will appear once your payment details have been verified.

Organisation Type
This is where you select what type of organisation you belong to. The one you select will determine what type of Projects will be created by default.
Claiming Only
- Projects will only have a single contract that your organisation makes claims against.
- Typically for: Subcontractor, Consultant, Client Project Manager.
Payment Schedules Only
- Projects will only have contracts that your organisation approves.
- Typically for: Owner/Developer, Home Builder.
Payment Schedules and Claiming
- Projects will have a mixture of contracts that your organisation makes claims and approves.
- Typically for: Head/Main/General Contractors.
Time Zone
This time zone setting affects account-level features only (such as when automatic emails are sent). Claim and Payment Schedule dates and times are controlled by each Contract's time zone. This should automatically be set based on your address.
Users & Permissions - Inviting new Users
PayLab > Manage Account > Users & Permissions
This is where you will manage Users for the Organisational Account.
Adding a new user
Hit Add New User on the top right and enter the name and email of your new Users within your company. Click 'Save', and PayLab will add them to the user list, and send an email notifying them they have been invited.

Managing Account Level Permissions
You can assign users by clicking on the three dots to the right of each user.

You can then select the Owner, Admin, or Viewer. These are applied at account level, becoming the default access applied to all projects & contracts.
Account Access types
- Owner - All Admin permissions, as well as being able to manage billing & subscription.
- Admin - Can invite, add or remove other users. They may also edit company details, manage projects and contracts.
- Viewer - May view projects, but can not invite others, submit or Approve Claims or edit company or project details.
Other Options
- Remove Account Access - User will not have access to projects and contracts within your Organisation unless specifically added.
- Deactivate - User will have no access to PayLab.
- Resend invite - Resends the invitation link to User so they can access PayLab if they do not find it in their inbox. Please make sure they check their spam folder!
Account Types
PayLab has two distinct account identity types: Organisational & Personal.
Organisational Account - This is the account for your entire organisation and what the PayLab Subscription is associated to. Multiple personal accounts can be added in an Organisational Account to make claims/payment schedules.
Personal User - This is your Personal account linked to your email address. A personal user can be part of multiple Organisational accounts but you will need to be given invite from an existing PayLab user within that organisation to gain access.
What to expect as a new user
An example workflow of what to expect when you are first invited into PayLab is summarised in the table below. All users receive an invite email, but the steps you carry out differ depending on if your email provider accepts One Time Passwords (OTP) or requires use of a Multi Factor Authentication app, as is typical with a Microsoft business account.
| Activity | Email Provider accepts OTP | Email provider requires MFA |
| New Organisation setup |
Owner user receives invite email |
Owner user receives invite email |
| PayLab invite to organisation email | All users | All users |
|
Authentication |
One Time Password email is sent with a code to enter into PayLab. For a few weeks, that browser will typically not require additional authentication. |
Email provider account password |
Next Steps - Set Up Your First Project
Now you're ready to set up your first PayLab Project & Contract!
Or maybe you have received a Contract invitation from another PayLab Organisation Account - if so, you can just instantly follow the email invite and mirror their project into your own Organisation's PayLab account.
- This article covers setting up new projects - Creating New Projects.
- And this looks at contract setup - Creating a Contract
Related articles & pages
- Managing your subscription
- Security at asBuilt
- PayLab Email Alerts will show you how to control how frequently (if at all) PayLab notifies you