Overview
Vault has a varieties of viewers and functionalities. One of the most useful is the Model Viewer - for how to use this Viewer, please refer to the Quick Start Guide.
The Vault Model Viewer utilizes Forge which can display most file types used in CAD software including RVT, NWD, IFC, and DWG. Each file type will have its own advantages and limitations, it is therefore important to choose the file type that suits your means and desired outcomes.
Creating Usable Files
Key Export Setting
The most important setting is to ensure that all files are detached or e-transmitted from any central model, and where applicable, publish settings are set to portray and organize the relevant information.
CAD Files
Files such as IFC and DWGs are simple and can be uploaded directly to model viewer with minimal input, however the author should focus on cleaning out any rogue elements or unnecessary information as this will improve the useability of the 3D view.
Navisworks Files
NWDs are a convenient format for displaying federated models, as they are a highly stable format and can be easily compiled from existing NWCs and can also convert most CAD file types to NWC. The NWD will also carry through saved viewpoints to Model Viewer. Note that this does not include any drafting views, plans, or sheets.
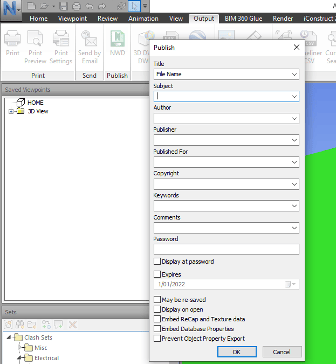
If you are exporting an NWD from an NWF, we recommend exporting from the Output tab, select to the Output tab, and choose NWD in the Publish section. This allows you to add controls and metadata to the file.
Revit Files
Using a Revit file is by far the most comprehensive and robust format to use in the Vault Model Viewer. For ideal viewing, it does require some additional setup.
The first, and most important thing to do is to detach or Etransmit a copy from your main Revit file.
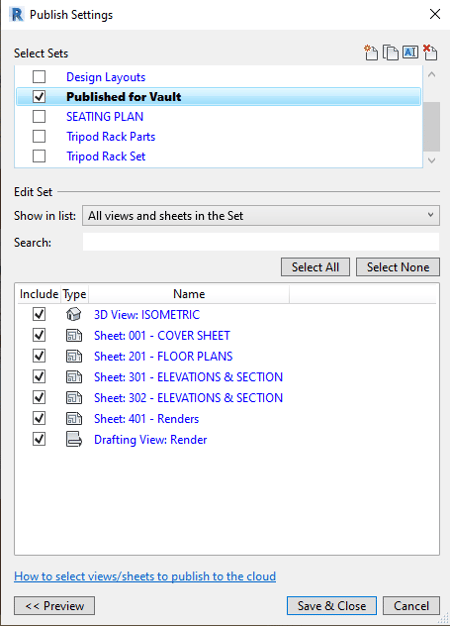
Once you have done this, open the detached copy and go to Collaborate > Publish Settings.
In the Publish Settings window, we recommend you create a publishing set for Vault display models, then add the views and sheets you would like to be visible in Model Viewer. We recommend you select all the 3D, Sheets, Plans, Sections, and Drafting Views so they are viewable in Vault.
Once you have done this, going forward it’s just a case of making sure it's checked when saving the model. Note that this step can be done prior to detaching or e-transmitting and is strongly recommended if you are the author; or can request this of the author as it will save you doing this each time you update the Model Viewer.
Once this is done, Save & Close the Publish Settings window.
Now Save and Close the Revit file.
Upload to Microsoft Azure Storage Manager
Once you have set up your files, they need to be uploaded to the appropriate directory on your Azure Storage Manager (see our uploading guide for this).
Next step is to contact you Vault Support Team to begin processing the model. You should expect to see the model within your Vault instance after 48 hours, providing there are no issues with the files.
Support
If you experience any issues or have any questions, please contact your Customer Success representative or Vault Support at:
Support Hub: https://support.asbuiltvault.com
Email: support@asbuiltvault.com
Telephone: +64 9 888 4554