Overview
Adding supporting documents such as invoices, photos, variation approvals, or delivery evidence helps provide context and transparency across your projects. In PayLab, you can easily upload, organise, and share these files within Contracts, Claims, Payment Schedules, and Line Items.
This centralises all your project information in one place, making it easier for teams and external stakeholders to access the right documentation throughout a project’s lifecycle.
When to use it
Use the document attachment feature when you need to:
-
Provide supporting evidence for claims, variations, or progress payments.
-
Share background information or approvals with your project team or external parties.
-
Upload variation quotes, delivery dockets, or handover certificates to maintain a complete audit trail.
-
Attach documents that must be shared with third parties through issued payment claims or schedules.
-
Keep all project documents organised and accessible in one location for long-running or complex projects.
How to use it
1. Adding Documents to Contracts
To attach documents to a contract:
-
Navigate to the specific contract page.
-
Scroll down to the Contract Documents section.
-
Click Add Documents, then drag and drop your files or select them from your device.

2. Attaching Additional Documents to a Claim
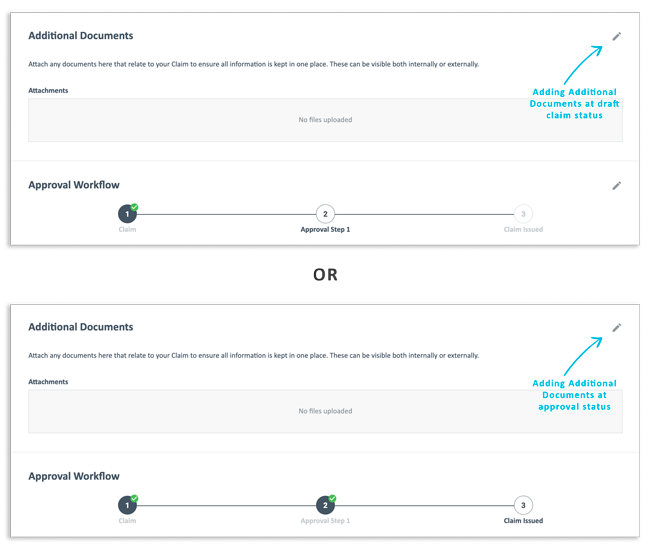
You can add documents to a claim before or after approval, but not after it has been issued.
-
Scroll down to the Additional Documents section.
-
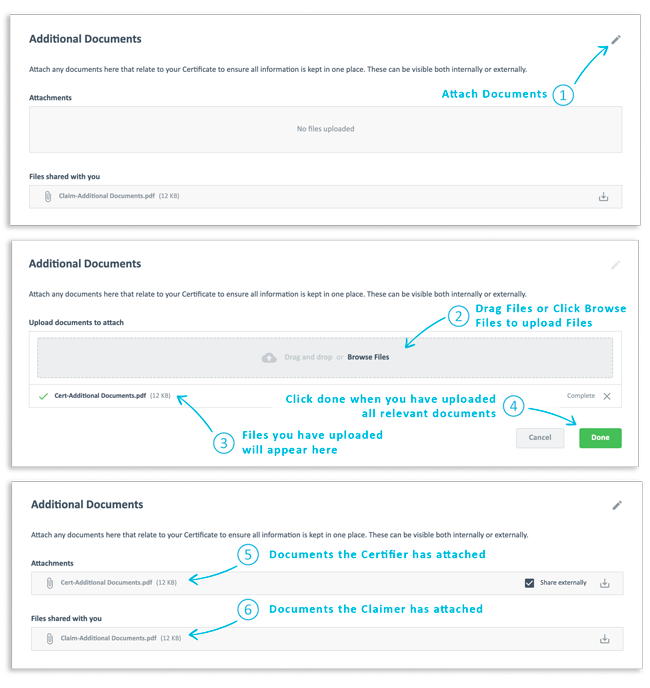
Click the pencil icon on the right.
-
Drag and drop your files or click Browse Files to select them.
-
Click Done to upload.
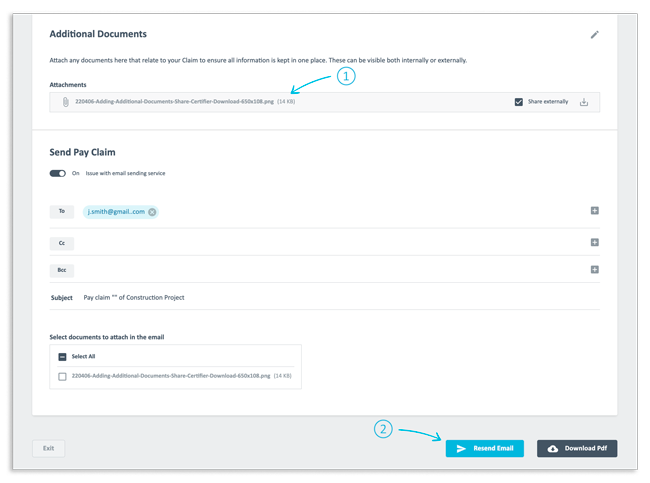
(Optional) To share files with your contract’s third party, select Share externally. They will be able to view and download these files once the claim is issued.
If your third party is not on PayLab, these documents will attach directly to the Payment Claim email when it’s sent via email.

*Note: Any files you attach here will only appear within this specific claim or payment schedule. They will not appear in the Project Attachments section, nor will they carry over to previous or future claims.
3. Attaching Additional Document to a Payment Schedule
When reviewing a Payment Claim, you may find attached files from the Claimer in the Additional Documents section.
-
Files shared by the Claimer appear under “Files shared with you.”
-
You can download and view these files directly.
To upload your own supporting documents:
-
Click the pencil icon in the Additional Documents section.
-
Drag and drop files into the grey box or click Browse Files to select them.
-
Click Done to confirm.
Note: Claimer-uploaded files will appear on the Payment Schedule for both parties, but any documents uploaded by the Approver will not appear on the Claimer’s original Payment Claim.
4. Adding Documents to Line Items (Base Contract, Variations, and Materials)
Each line item allows you to attach relevant documents either during setup or later when editing.
-
On the Base Contract Line Item setup screen, locate the line item you wish to update.
-
Under the Action column, click the pencil icon.
-
Upload the relevant documents using drag-and-drop or file browsing.
The same process applies for Variations and Materials line items.


Adding an additional file can be done after you approve or issue a Claim and will automatically appear on the payment schedules as well. If you are wanting to notify the Approver that you have attached additional documents you can resend the email.